If you use various services through the Google Chrome browser, it often requests access to the camera or microphone. This often happens if you use Chrome to access Instagram, Discord, or Skype. The user is hesitant to turn on the microphone and camera without figuring out what it means for Google Chrome to use the webcam. So in this material, we will break down the mechanics of this process – how to allow access to the microphone and camera for Google Chrome.
Using camera and microphone in Google Chrome
If your phone, computer, or tablet has a camera, sites that require it will automatically turn it on. Many people question whether it is safe to place access to the camera and whether the data is being shared with other people or intruders.
Normally, the browser only requests access to the camera on HTTPS sites, which are protected by SSL and TLS encrypted transport protocols.
However, you should be vigilant and not click the “Allow” button on HTTP sites yourself. The browser itself marks them as insecure.
How to enable camera or microphone access
You can allow camera access in Google Chrome for all sites or only for some sites. Or you can deny access everywhere and leave it to only a few selected resources.
In general, you only need to click the “Allow” button when the browser sends you the request.
Let’s see how to enable the webcam in Google Chrome on different platforms – it’s about the same everywhere.
On PC
On a computer, you need to:
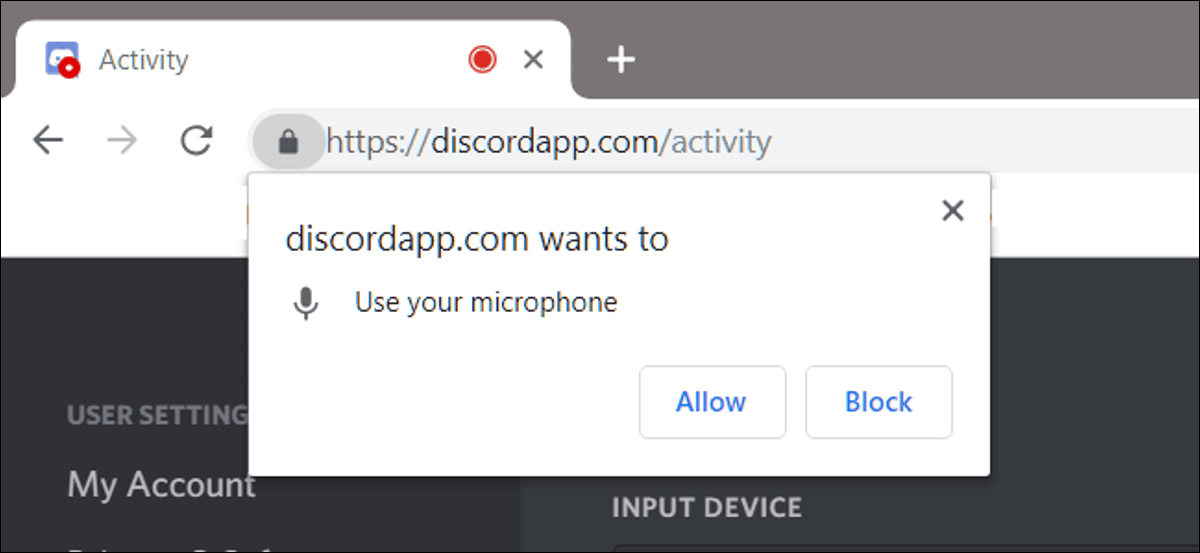
- Open Chrome and go to the desired site.
- From the two options that Chrome offers, select “Allow”.
- If the prompt does not appear on the screen, then you have probably already blocked the site before. You can unblock it in “Settings”.
To change camera and microphone’s permissions:
- Open Chrome.
- At the top right press the three dot button.
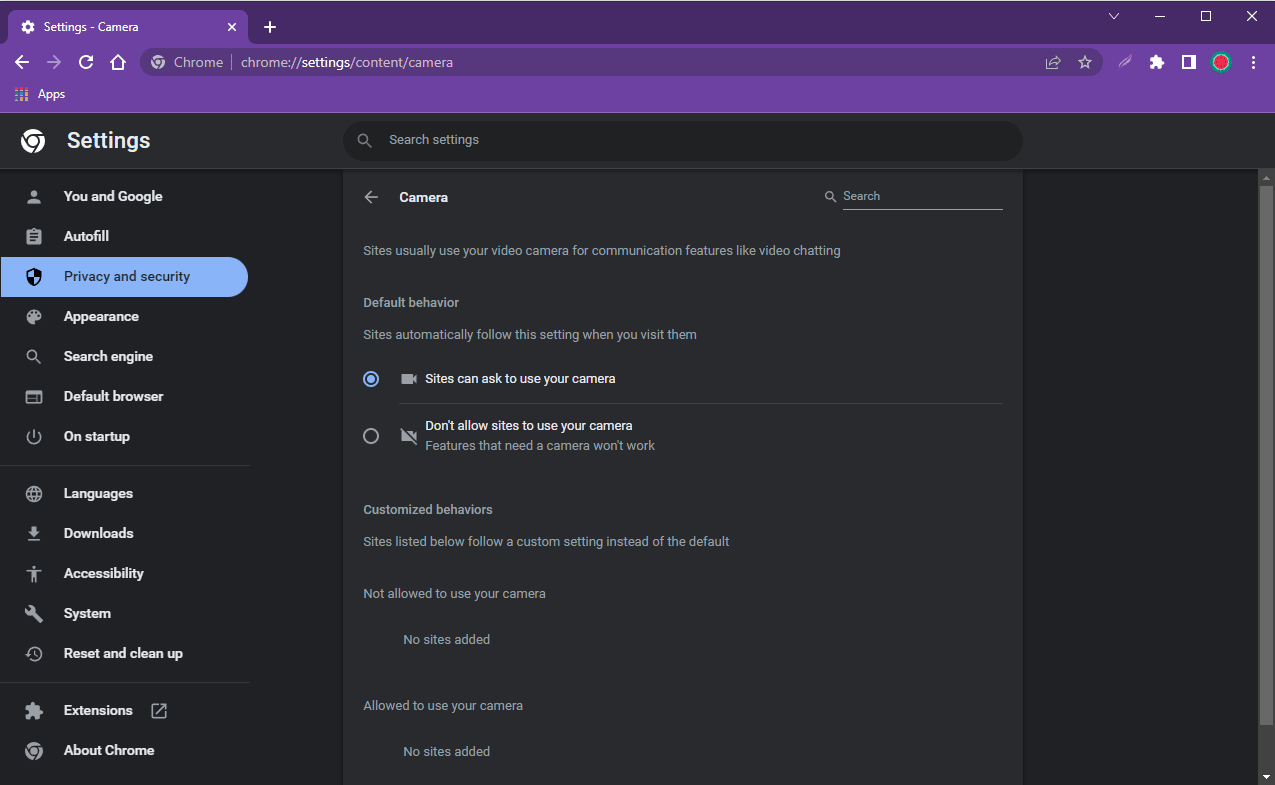
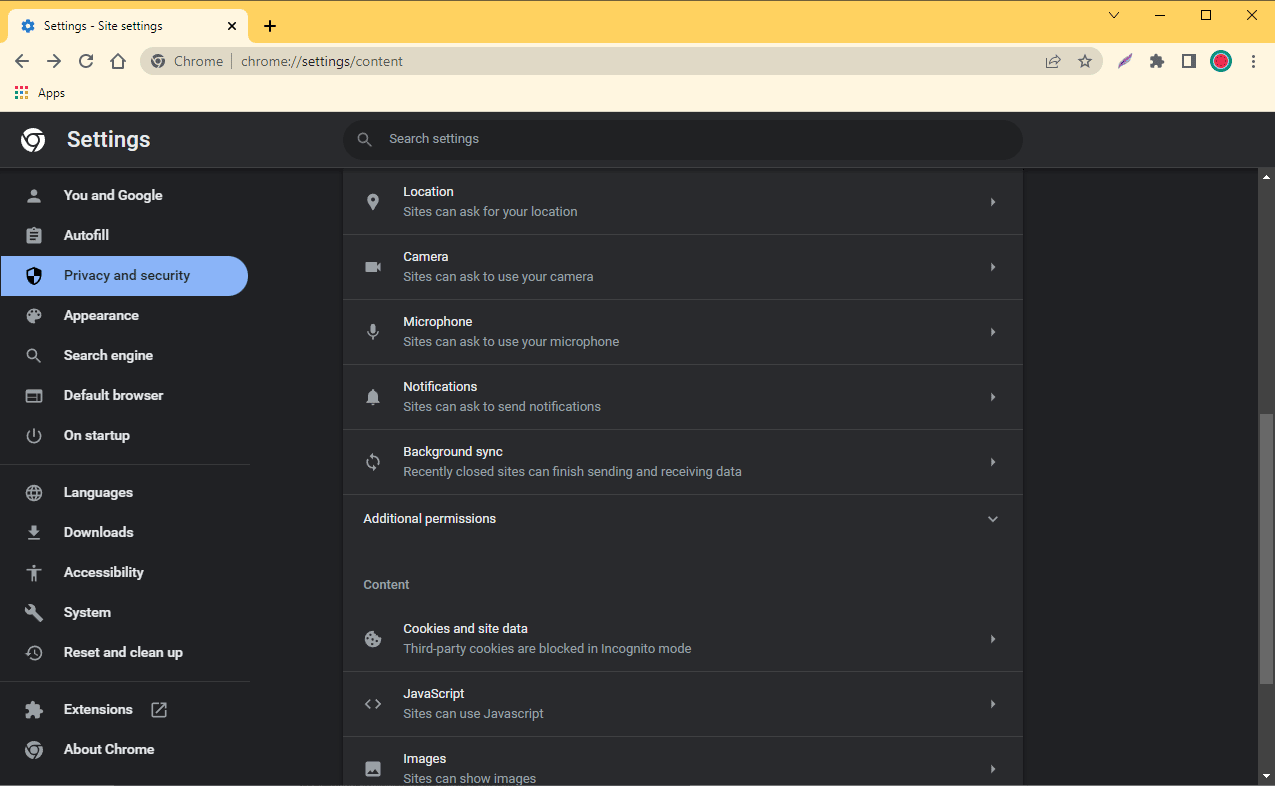
- Proceed to “Settings” > “Privacy and security” > “Site settings” > “Camera” or “Microphone”.
To allow a site that you already blocked: under “Not allowed,” select the site’s name and change the permission to “Allow.”
On Android
When visiting a site in Google Chrome on Android select “Allow” when prompted. Also, check your permissions in the application’s settings:
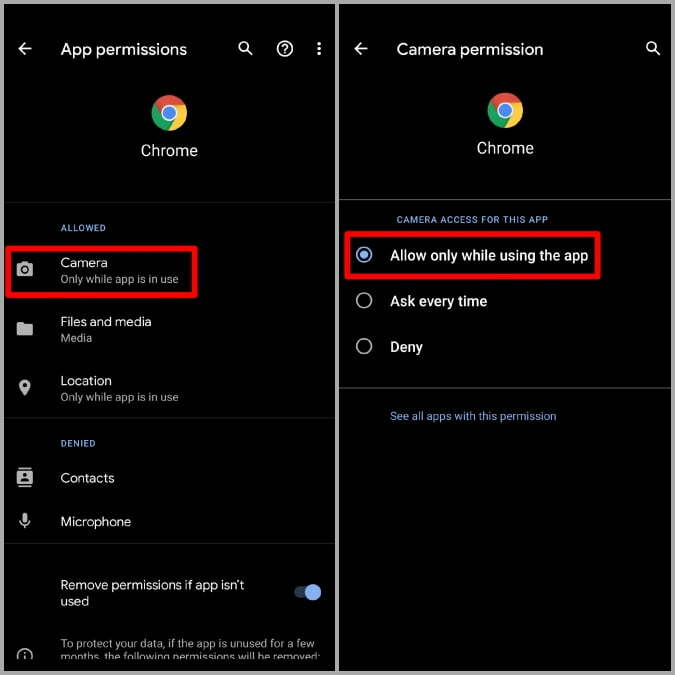
- Open Chrome and tap on the three dot button.
- Proceed to “Settings” > “Site settings” > “Camera” or “Microphone”.
- If you see the site you want to use under “Blocked”, tap the site, then “Access your camera” (or microphone), and select “Allow”.
On iOS
When visiting a site on your iPhone or iPad select “Allow” when prompted. If don’t see the prompt, then you need to allow Chrome access to your camera and microphone in your device’s settings:
- tap on the Settings app on your desktop,
- proceed to “Privacy” > “Camera” or “Microphone”.
- flip the switch to on.

How to disable camera or microphone access
You can disable access to the camera or microphone in the same manner as you enable it.
On PC
Open the browser and go to chrome://settings/content and choose “Camera” or “Microphone”. Select “Don’t allow sites to use your microphone” (or your camera) to deny microphone or camera access for all sites.

To remove an existing exception or permission for a certain site click “Delete” to the right of the site.
On Android
Tap “Block” when a site asks for your permission or manage your application settings:
- Launch Chrome and open its menu (the three dot button).
- Proceed to “Settings” > “Site settings” > “Camera” or “Microphone”.
- Under “Allowed”, tap the site, then “Access your camera” (or microphone), and select “Block”.
On iOS
You can choose “Block” when asked for a permission to use your camera or microphone, or deny access for all sites in your device’s settings:
- tap on the Settings app on your desktop,
- proceed to “Privacy” > “Camera” or “Microphone”.
- flip the switch to off.


