The problem of lack of free space on the hard drive is known to all computer owners, including those who use BlueStacks App Player. Having installed the emulator on your C drive, soon you may notice that it is impossible to install other software due to lack of memory. Therefore, it is important to figure out how to transfer BlueStacks to another drive.
Is it possible to change the location of BlueStacks?
Yes, you can totally move your BlueStacks files to another drive, whether physical or logical. For example, from “C” to “D” and vice versa. This is a great way to save free space if you’re running low on it.
We are going to do it in four steps:
- create a backup for your BlueStacks 5 files,
- uninstall the current instance of the BlueStacks App Player,
- reinstall BlueStacks,
- restore the backup files.
Important note: you can restore backups only on the same version of the emulator. For instance, BlueStacks 5.6 backups cannot be restored on BlueStacks 5.7.
Creating backups
First, you need to make the Program Data folder visible, because it’s hidden by default. If you’re using the Windows File Explorer:
- press Win+E,
- open the View tab,
- mark the Hidden items.

Now, go to C:\ProgramData\BlueStacks_nxt, copy the “Engine” folder and the “bluestacks.conf” file.
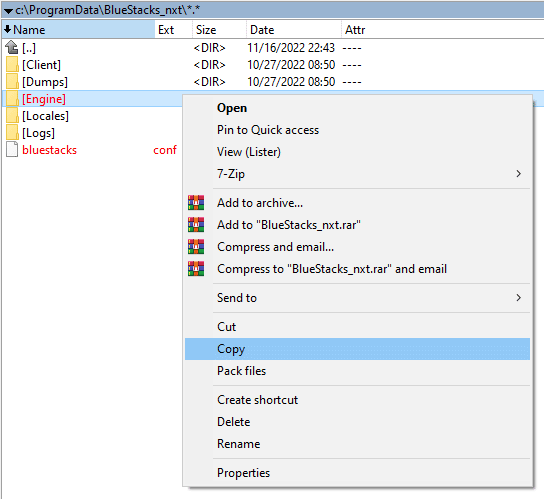
Then paste them at any other location on your computer.
Uninstalling BlueStacks
Of course, you may uninstall the application in a usual way, like: Start > Settings > Apps > Select BlueStacks > Press Uninstall.
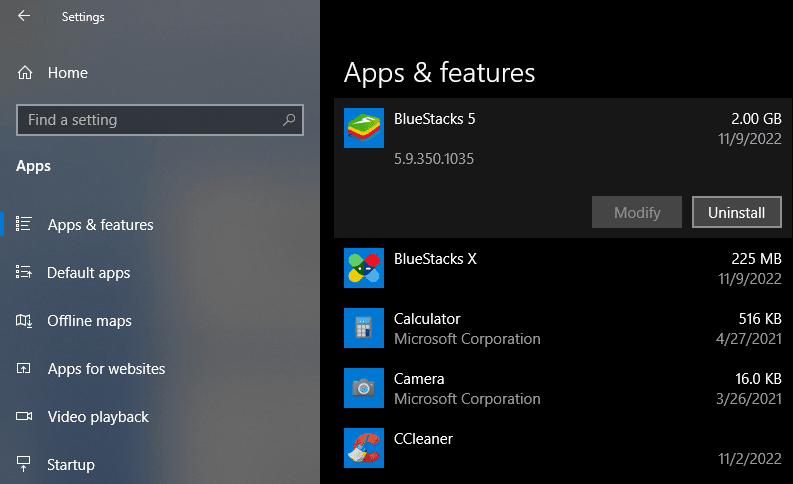
But a cleaner way would be to delete all temporary files first, and then use a special utility tool, named BSTcleaner, to uninstall BlueStacks properly.
In order to delete the temporary files:
- Press Win+R to call up a Run window.
- Enter the query “%temp%” (without quotes), and hit OK.

- Delete all folders and files in the directory that opens.
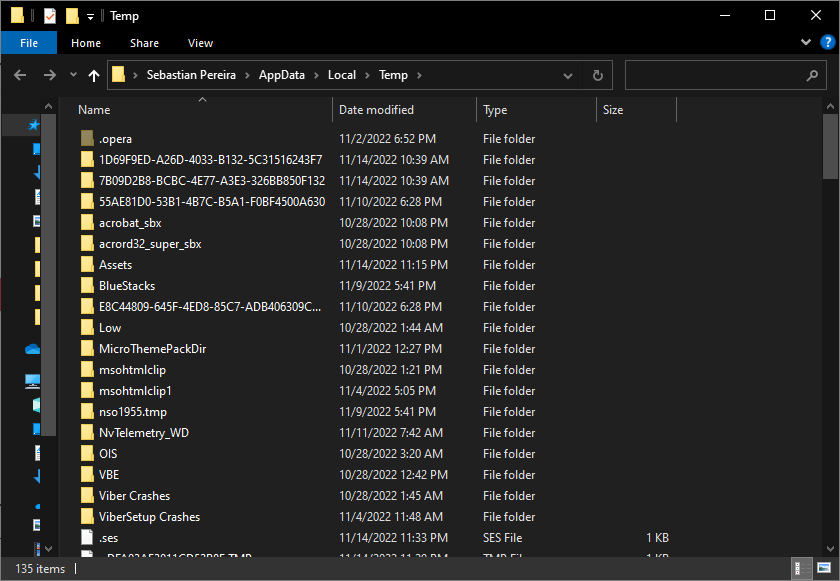
- Press Ctrl+A to select everything in that folder.
- Press Shift+Del to remove those files and folders completely.
Reinstalling BlueStacks
Now, download the same version of BlueStacks you had before, from our site.
In the installation wizard click on “Customize installation” to select a folder on another drive.
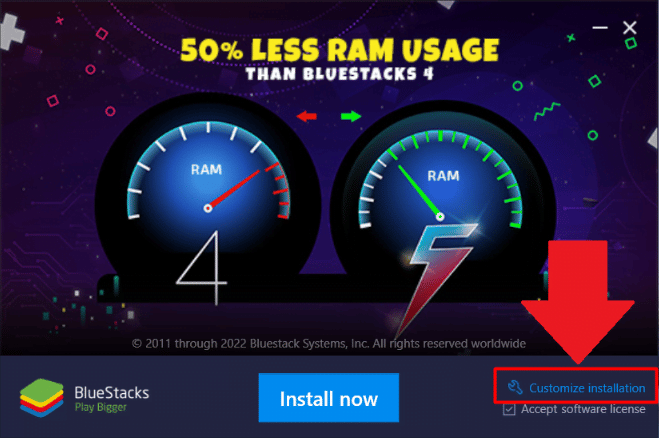
After it’s done, click on “Install now”.

Restoring backups
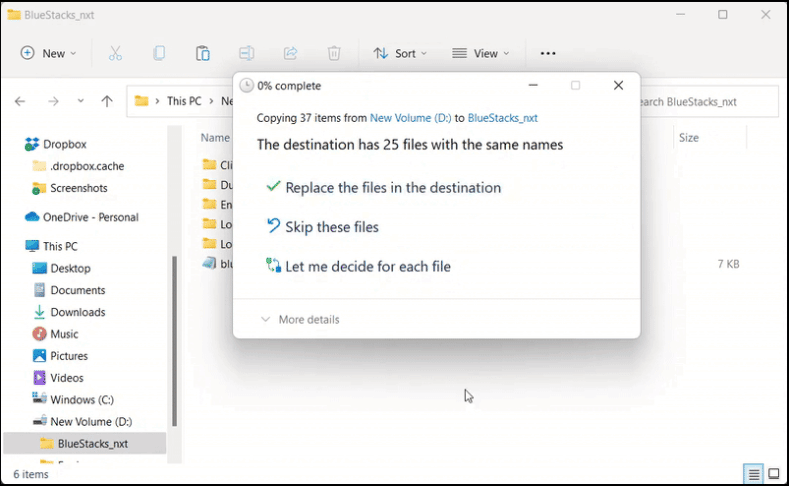
Copy your backup files and paste them in the new BlueStacks location. When prompted, choose “Replace the files in the destination”.
Now open the new BlueStacks folder (D:\BlueStacks_nxt, for instance), then:
- open the “Engine” folder,
- open the “Manager” folder,
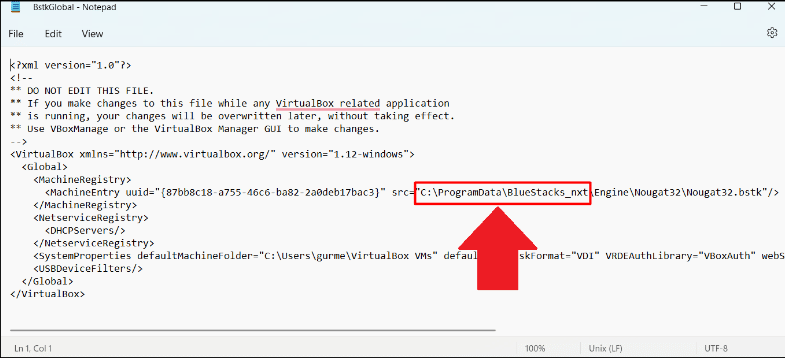
- open the “BstkGlobal” file in Notepad,
- Change the path mentioned in the entry <MachineEntry uuid=”{87bb8c18-a755-46c6-ba82-2a0deb17bac3}” src=”C:\ProgramData\BlueStacks_nxt\Engine\Nougat32\Nougat32.bstk”/> to the new path, for example, D:\BlueStacks_nxt\Engine\Nougat32\Nougat32.bstk.
- save the changes and close the file,
- go back to the “Engine” folder,
- open the “Nougat 32” folder,
- open the “Nougat32.bstk file” in Notepad,
- find this entry <SharedFolder name=”InputMapper” hostPath=”C:\ProgramData\BlueStacks_nxt\Engine\UserData\InputMapper” writable=”true” autoMount=”false”/>, and replace the path to the new one, for example, D:\BlueStacks_nxt\Engine\UserData\InputMapper,
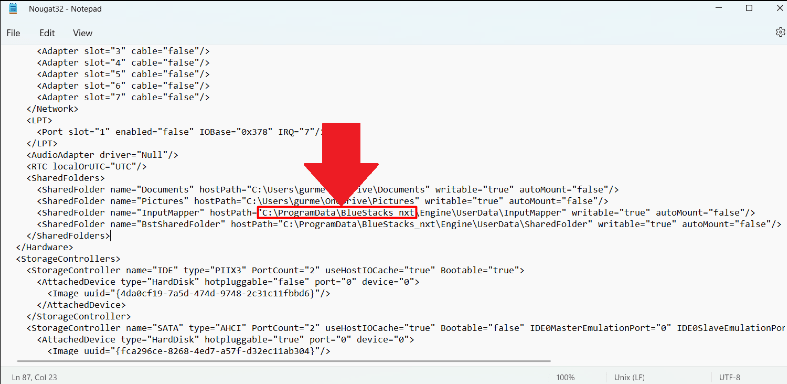
- now find this entry <SharedFolder name=”BstSharedFolder” hostPath=”C:\ProgramData\BlueStacks_nxt\Engine\UserData\SharedFolder” writable=”true” autoMount=”false”/>, and replace the path to the new one, for example, D:\BlueStacks_nxt\Engine\UserData\SharedFolder,
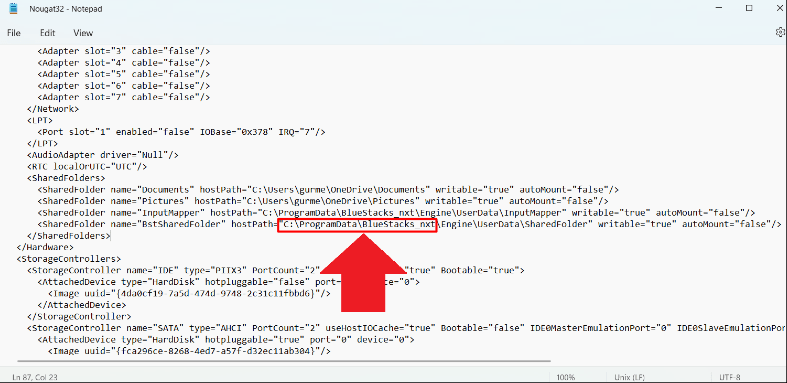
- save the changes, and close the file,
- in the “Nougat 32” folder find the “Nougat32.bstk-prev” file, and delete it.
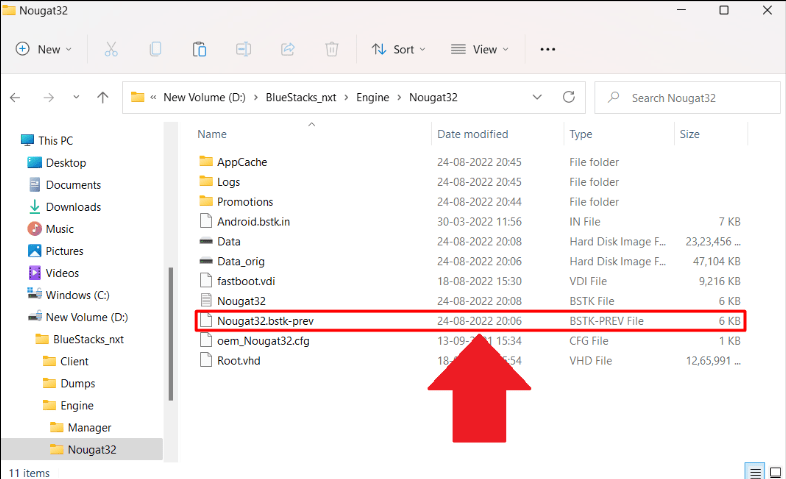
If you have Nougat 64 or Pie 64 folders, repeat all the above mentioned actions there.


